From opening the app to a room full of students answering: about five minutes. No account, no setup wizard, no IT ticket for a normal classroom.
Before you start
What you need
A Mac running macOS 14 or later — this is where the game lives.
A projector or TV — optional but recommended; the game board is built for it.
Student devices with a browser — phones, Chromebooks, iPads, laptops. Nothing to install.
One network — your Mac and the students' devices on the same school network.
Two one-time Mac prompts — say yes to both
"QuizBlast would like to find and connect to devices on your local network." Click Allow. If it's ever declined, macOS won't ask again — fix it in System Settings → Privacy & Security → Local Network, and switch QuizBlast on.
"Do you want the application QuizBlast to accept incoming network connections?" (only if your Mac's firewall is on). Click Allow — this is how students reach the game. Deny it and everything will look fine on your screen while nobody can join.
The five steps
1
Pick a game type
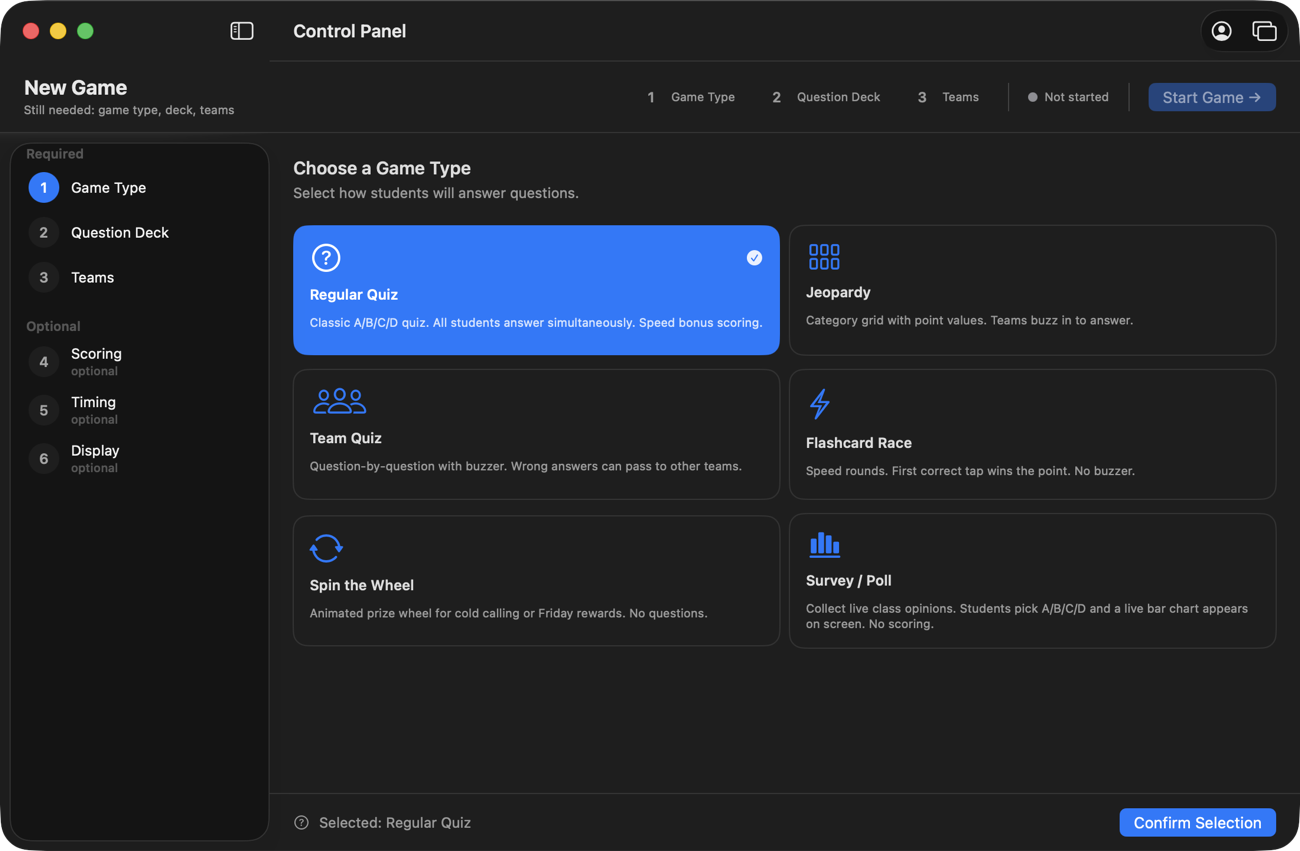
Open QuizBlast and you're already on the New Game screen. Pick how students will answer — classic quiz, Jeopardy, team buzzer, flashcard race, spin the wheel, or a live poll — and click Confirm Selection. The sidebar tracks the three required steps; Scoring, Timing, and Display are optional and have sensible defaults.
Six modes, one click. Regular Quiz is a good first game.
2
Choose your questions
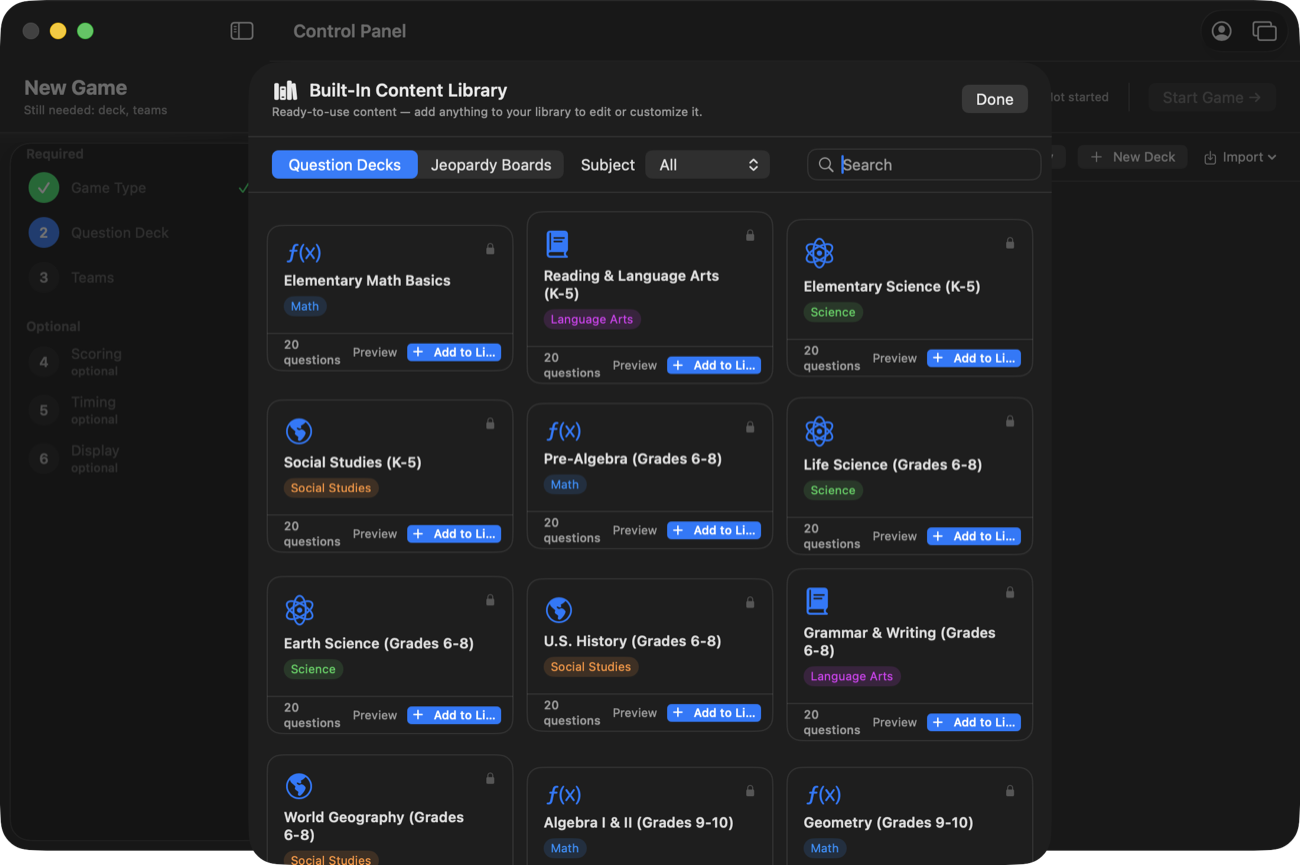
On the Question Deck step, open the Content Library for 25 ready-made decks and 8 Jeopardy boards — 740 questions and clues from kindergarten to 12th grade, sorted by subject. Click Add to Library on any deck, then select it. Or build your own — the deck guide covers writing one from scratch, importing a CSV, remixing a built-in deck, and building a Jeopardy board with a Daily Double and Final Jeopardy.
Ready-made decks — add one to your library and make it yours.
3
Decide how students are grouped
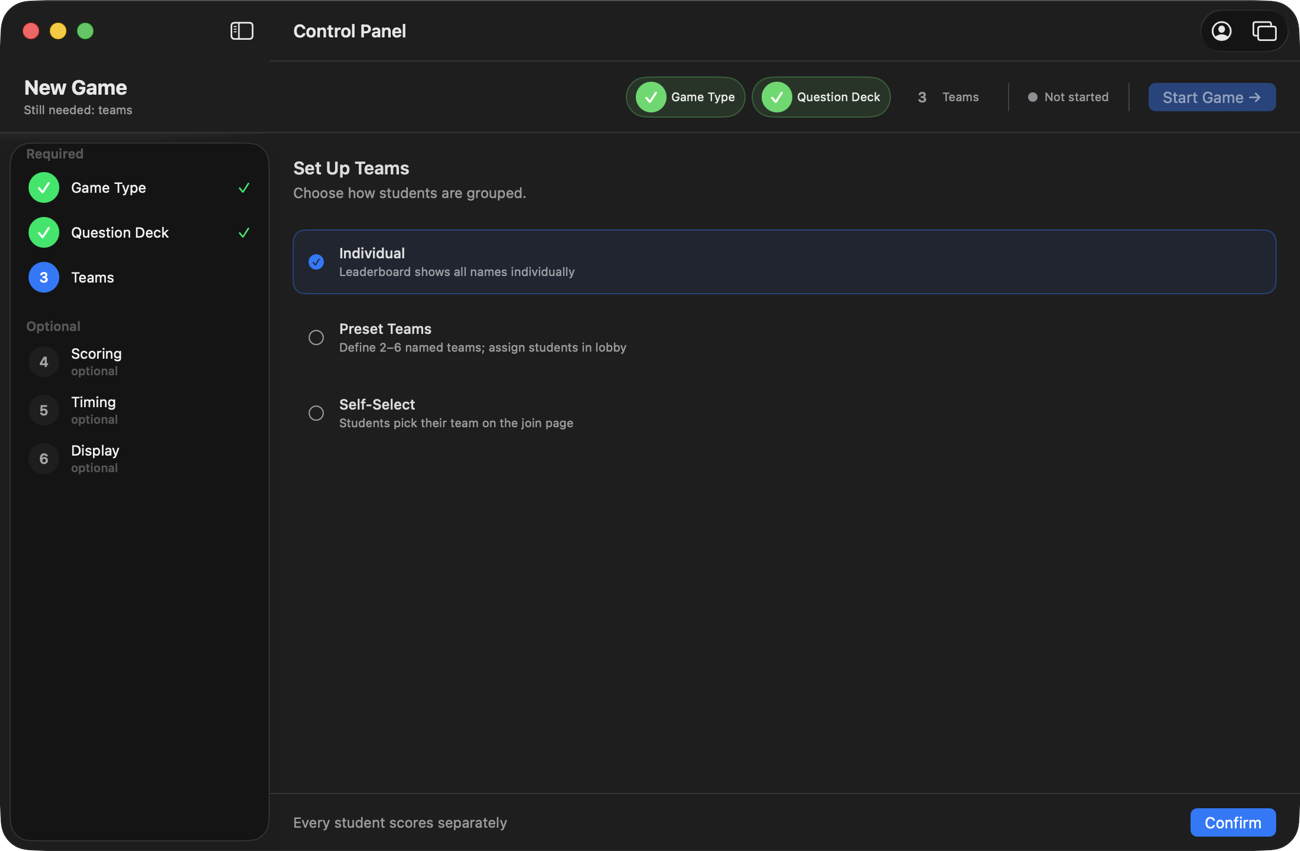
Individual scoring, preset teams you assign in the lobby, or self-select where students pick a team when they join. For a first game, Individual is the default and works everywhere. Click Confirm, and the Start Game button lights up.
Teams are optional — Individual is one click and done.
4
Start the game and project the QR code
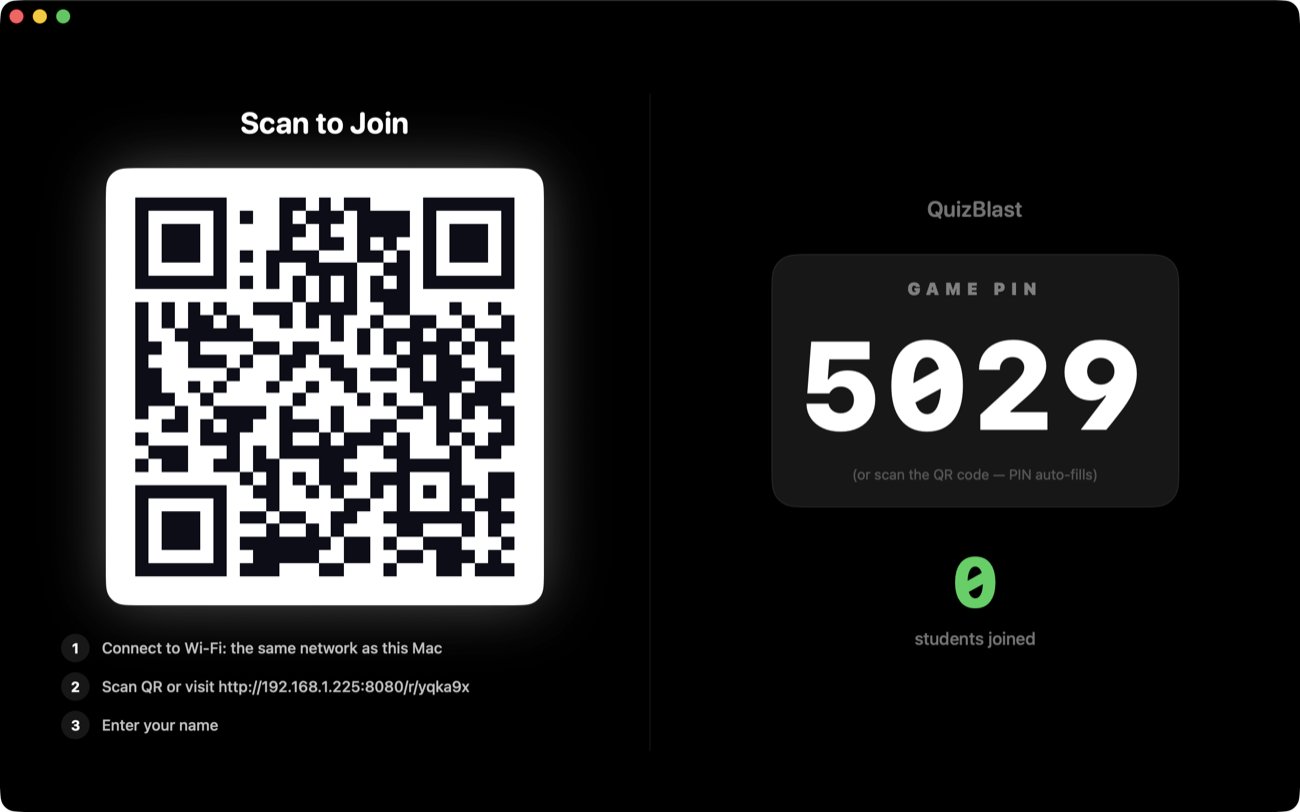
Click Start Game. Your Mac opens the room and shows a PIN. Open the Game Display window from the toolbar and drag it to the projector — it shows a big QR code, the game PIN, and the join address. Your control panel, with the answers on it, stays private on your screen.
What the class sees: scan, or type the short address. The PIN fills itself in from the QR code.
5
Let them in and play
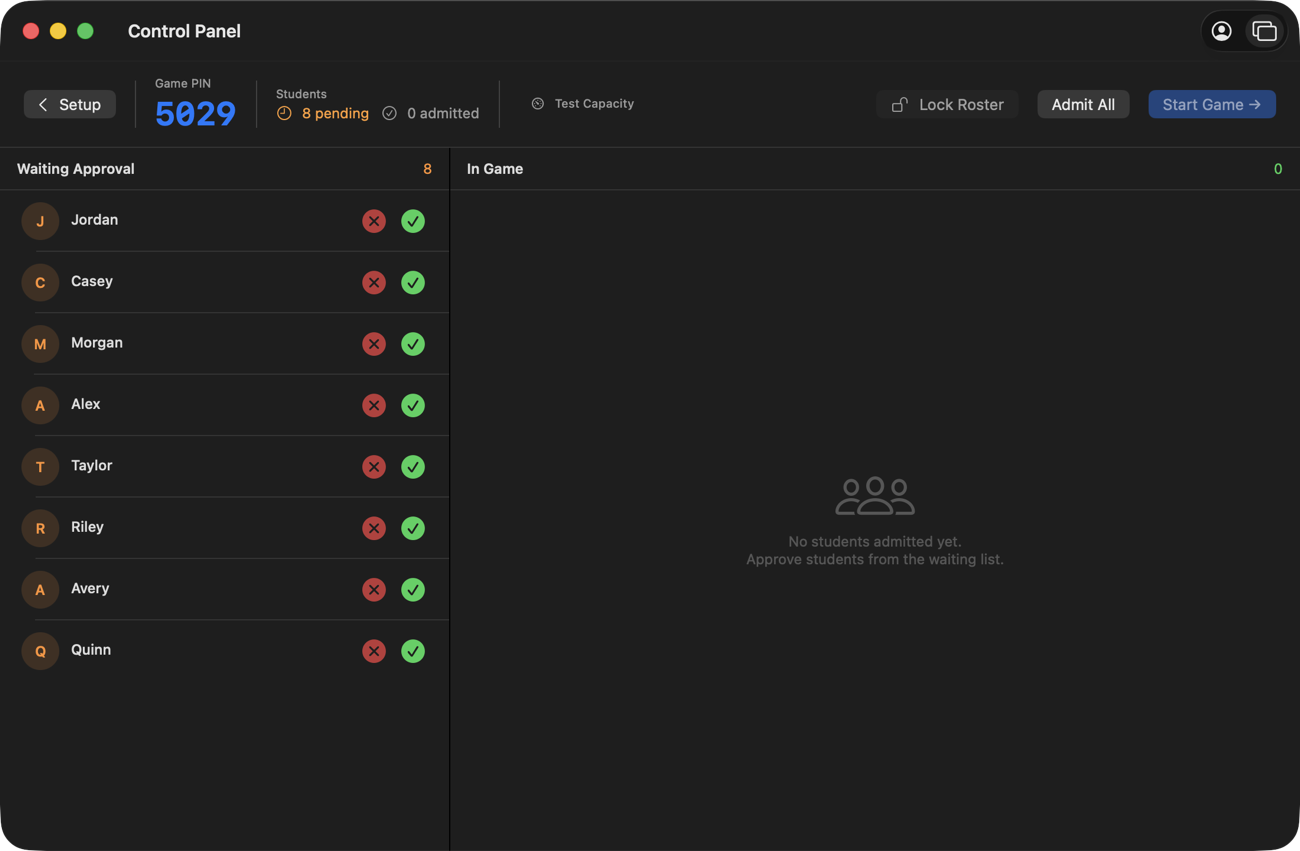
Students scan the code, type their first name, and appear in your Waiting Approval list. Approve them one by one, or click Admit All. When everyone's in, Lock Roster stops latecomers and pranksters, and Start Game begins question one. From there the control panel drives everything — reveal answers, show scores, skip questions — while the projector does the showing off.
Every join needs your approval — nobody sneaks into your game.
If students can't load the join page
Nine times out of ten this is the network, not the app. The quick checks, in order:
Same network? Your Mac and the students' devices must be on the same school network. A student on cellular data can't reach a classroom game — have them join the school Wi‑Fi.
Guest Wi‑Fi? Guest networks block device-to-device traffic by design. Use the regular school network, never the guest one.
The two Mac prompts — if either was declined (see the top of this page), students time out while everything looks normal to you.
Run the Capacity Test in the lobby — it exercises the real join path and tells you before students do.
Still stuck? It's probably a school network policy.
Client isolation, VLAN separation, and content filters can all block the join page — and only your IT department can change them. Send them our IT & network guide: it names the exact settings for the common school systems and takes them about five minutes to check.
 QuizBlast